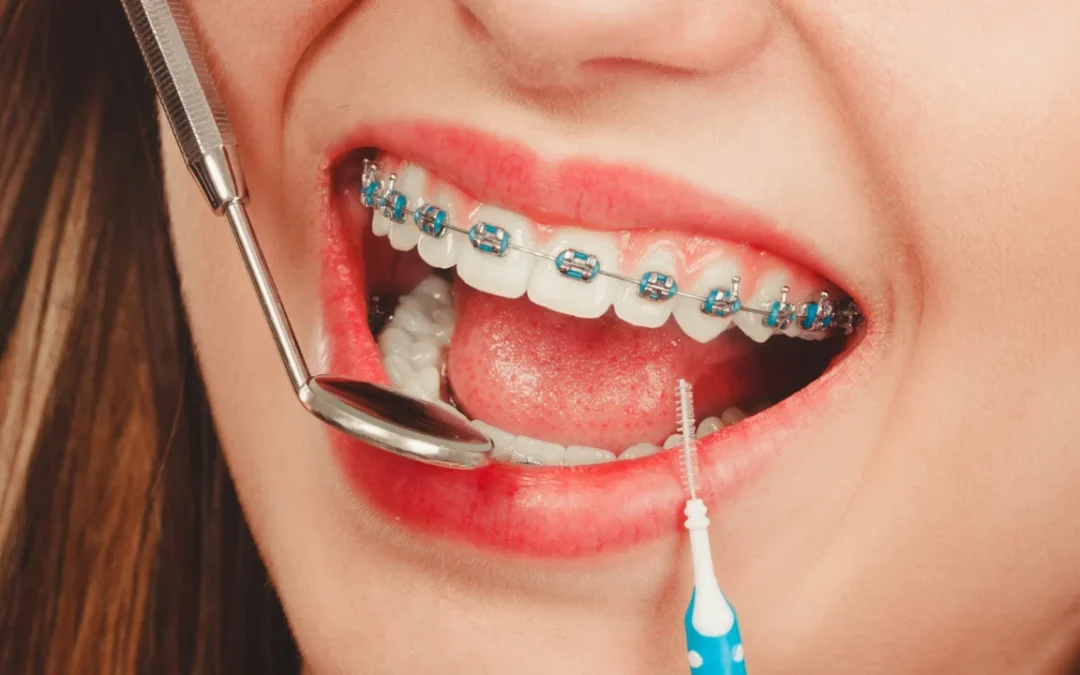
Getting braces can feel overwhelming for first-time patients, but understanding the process helps reduce anxiety and ensures a smoother experience. Many patients in Australia wonder how long the procedure takes, whether it will be painful, and what steps are involved. Typically, placing braces is a planned and structured process that combines thorough dental examination, careful bracket placement, and professional guidance on post-procedure care. At Parramatta Green Dental, we provide step-by-step orthodontic treatment that prioritises patient comfort while achieving precise alignment results.
How Long Does It Take to Put Braces On?
The time it takes to put braces on can vary based on factors like the type of braces, the complexity of the misalignment, and whether both upper and lower teeth are being treated. On average, the fitting appointment lasts 1 to 2 hours, with some cases taking a little longer if spacers, additional pre-treatment work, or detailed adjustments are required.
| Step | Estimated Time |
| Initial consultation & dental exam | 30–60 minutes |
| X-rays, photos, and digital scans | 15–30 minutes |
| Teeth cleaning and preparation | 10–15 minutes |
| Bracket application, wiring, and banding | 45–60 minutes |
| Final adjustments & post-procedure review | 10–15 minutes |
| Follow-up appointments | 15–30 minutes (every 4–6 weeks) |
Understanding this timeline helps patients plan their day, eat beforehand, and arrange for soft foods afterward. The overall duration includes the first appointment, but regular follow-ups are part of the orthodontic treatment plan to ensure proper alignment over time.
What Happens Before Braces Are Put On?
Before any brackets are applied, several preparatory steps ensure that teeth and gums are healthy, the treatment plan is accurate, and braces can be placed efficiently and safely.
Initial Consultation and Dental Exam
During the first appointment, your orthodontist evaluates tooth alignment, bite, and jaw health. This includes checking for crowding, gaps, overbite, underbite, crossbite, and any pre-existing dental issues that may affect treatment. Our orthodontists also assess gum health and enamel strength to determine the safest way to proceed with braces.
X-Rays, Photos, and Digital Scans
Diagnostic tools like X-rays, clinical photographs, and digital impressions help the dentist plan the exact positioning of brackets and archwires. These records provide a reference to track progress throughout treatment and ensure teeth move safely into the desired position.
Treatment Planning
Based on the diagnostic data, the orthodontist develops a step-by-step plan tailored to the patient’s needs. This includes choosing the type of braces (metal, ceramic, lingual, or clear aligners), determining whether spacers or pre-treatment procedures are required, and scheduling the fitting appointment.
Teeth Cleaning and Preparation
Before brackets can be bonded, teeth are professionally cleaned and dried to remove plaque and moisture. Clean surfaces help adhesive stick securely to the enamel, ensuring that brackets remain in place throughout treatment. Proper preparation also reduces the risk of gum irritation, enamel damage, and tooth sensitivity during and after the procedure.
Step by Step Braces Fitting Process
Once the preparatory steps are complete, the orthodontic appointment moves to the actual braces fitting. The process is carefully structured to ensure accuracy, safety, and comfort for the patient. Depending on the type of braces and patient-specific factors, the fitting typically lasts 60–120 minutes.
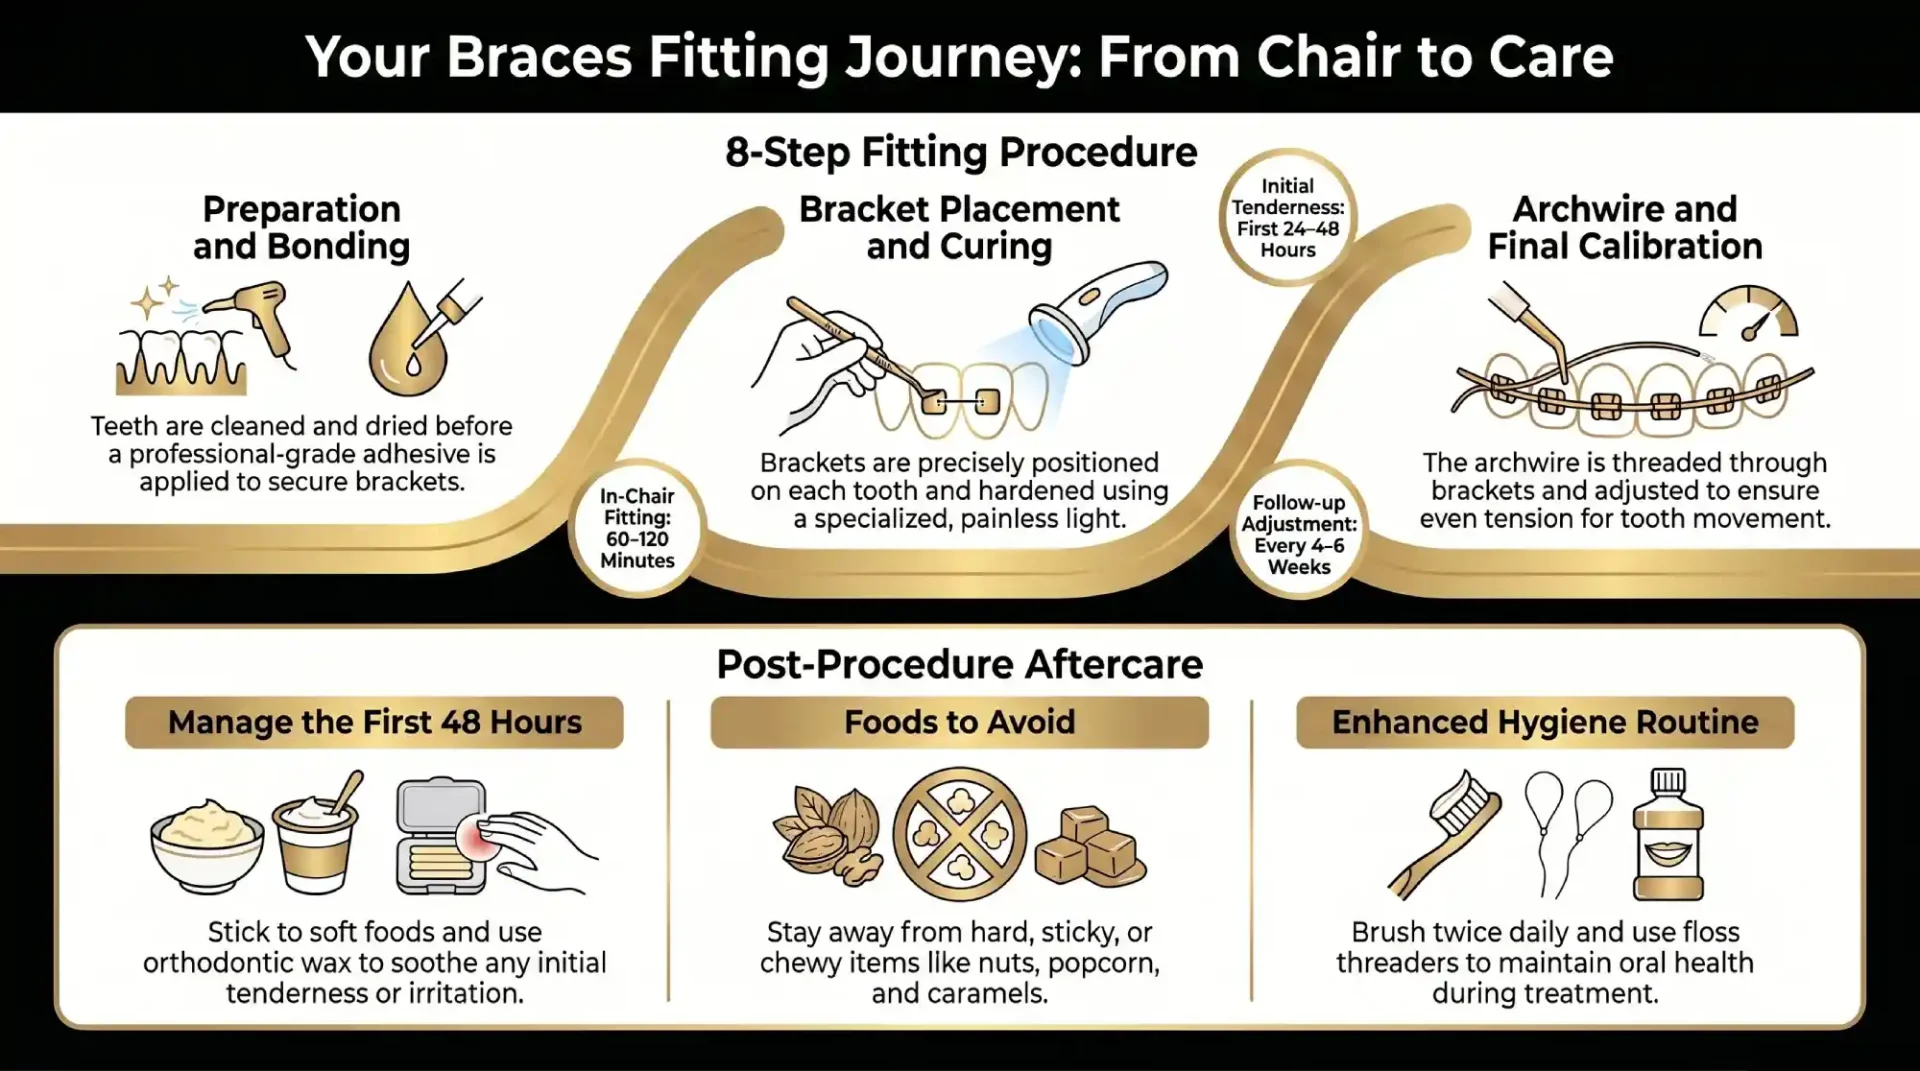
Step 1: Cleaning and Preparing the Teeth
Even if teeth were cleaned during the pre-appointment, the dentist or dental assistant ensures the surfaces are completely dry and free of debris. A fluoride rinse or protective gel may be applied to protect enamel. This step is crucial because moisture can prevent the adhesive from bonding properly, which could lead to bracket loosening or irritation.
Step 2: Applying the Bonding Agent
A dental adhesive is carefully applied to each tooth where a bracket will be placed. This bonding material ensures the bracket remains securely attached to the enamel during treatment. We use professional-grade adhesives designed to minimise enamel damage and prevent gum irritation during and after application.
Step 3: Placing the Brackets
Brackets are positioned on each tooth according to the orthodontist’s treatment plan. Metal braces, ceramic braces, and lingual braces may require slightly different placement techniques, but in all cases, precision is essential. For self-ligating braces, clips are used instead of elastic bands, which can slightly reduce appointment time.
Step 4: Curing the Adhesive
After the brackets are positioned, a special curing light hardens the adhesive. This step ensures that brackets are firmly fixed to the enamel. The patient may feel slight warmth from the light, but the procedure is painless.
Step 5: Securing the Archwire
Once brackets are bonded, the archwire is threaded through them. The wire serves as the main guide for tooth movement. The orthodontist adjusts the wire to ensure even tension across all teeth. Depending on the type of braces, elastic ligatures, clips, or self-ligating mechanisms are used to hold the wire in place.
Step 6: Adding Bands, Spacers, or Attachments
If required, metal bands are placed on molars, and spacers may be used to create room for movement. For patients using clear aligners or hybrid systems, attachments or buttons may be added to specific teeth to enhance alignment. These components help guide teeth precisely over time.
Step 7: Final Adjustments and Bite Check
Before finishing, the orthodontist checks that the bite is comfortable and brackets are correctly aligned. Any sharp edges are smoothed, and patients are instructed on using orthodontic wax for rubbing spots. The dentist also demonstrates how to maintain oral hygiene with braces, including brushing, flossing with interdental brushes, and rinsing with fluoride mouthwash.
Step 8: Post-Procedure Review and Care Instructions
Patients receive guidance on what to expect in the first 24–48 hours, such as mild pressure or tooth tenderness. Soft foods are recommended initially to prevent discomfort or bracket damage. Instructions include:
- Avoiding hard, sticky, or chewy foods like nuts, popcorn, and caramels
- Brushing at least twice daily with a soft-bristled toothbrush
- Flossing with a floss threader or water flosser
- Scheduling the first follow-up adjustment in 4–6 weeks
Parramatta Green Dental ensures that each patient feels confident with proper care techniques, reducing the risk of broken brackets and promoting faster, safer treatment progress.
Quick Table: Braces Placement Steps and Timing
| Step | Procedure | Approximate Time |
| Cleaning and preparation | Teeth cleaning, drying, fluoride gel | 10–15 minutes |
| Bonding agent | Applying adhesive to each tooth | 5–10 minutes |
| Bracket placement | Positioning brackets | 15–20 minutes |
| Curing adhesive | Blue light hardening | 5 minutes |
| Archwire insertion | Threading and securing wire | 10–15 minutes |
| Bands/spacers | Molars bands or spacers if needed | 5–10 minutes |
| Bite check & final adjustments | Ensure comfort and alignment | 10 minutes |
| Post-procedure review | Oral hygiene instructions, wax demo | 10 minutes |
Does the Type of Braces Affect How Long Fitting Takes?
The type of braces a patient chooses can influence both the fitting time and overall treatment experience.
- Metal Braces: The most common and straightforward to place. Fitting typically takes 60–90 minutes for both arches. Brackets are durable and easy to bond.
- Ceramic Braces: Tooth-coloured brackets that require careful handling. Fitting may take slightly longer due to their fragility.
- Self-Ligating Braces: Use clips instead of elastic bands, which can reduce minor adjustments during placement.
- Lingual Braces: Placed behind the teeth, requiring more precision. Fitting may take longer due to limited access.
- Clear Aligners: Unlike traditional braces, clear aligners do not require bracket placement. The first visit involves taking scans or impressions and delivering custom trays, which can take less time than in-chair braces but require patient compliance for effectiveness.
Understanding the differences helps patients choose a system that balances aesthetics, comfort, and treatment efficiency. We assess each patient’s case to recommend the best type of braces for their dental alignment and lifestyle.
Does Getting Braces Hurt?
Most patients report that placing braces is not painful, although a mild pressure sensation may be felt as the brackets are positioned and the archwire is secured. Discomfort usually develops within the first 24–48 hours as teeth begin adjusting to the applied forces.
Common experiences include:
- Tooth tenderness when biting or chewing
- Slight soreness of gums, lips, or cheeks
- Mild jaw pressure or headaches for the first day or two
Using orthodontic wax on brackets and following post-procedure instructions can significantly reduce irritation. OTC pain relievers such as acetaminophen or ibuprofen are generally safe unless contraindicated, and our dentists provide specific recommendations for Australian patients.
Post-Procedure Care: First 24–48 Hours
Immediately after brace placement, patients should follow these guidelines to minimise discomfort and protect the brackets:
- Soft foods only: yoghurt, mashed potatoes, soup, pasta, scrambled eggs, smoothies, soft fish, and cooked vegetables
- Avoid hard, sticky, or chewy foods: nuts, popcorn, caramels, gum, and crusty bread
- Oral hygiene: brush with a soft-bristled toothbrush, use fluoride toothpaste, and floss carefully using interdental brushes or a water flosser
- Wax for rubbing spots: apply on the brackets causing cheek or lip irritation
- Rinsing after sugary or acidic foods: protects enamel and prevents white spots
Following these instructions ensures patient comfort and reduces the risk of bracket loosening or oral irritation.
Follow-Up Appointments and Adjustments
Brace placement is just the start of orthodontic treatment. Patients return for regular adjustments every 4–6 weeks, during which the orthodontist:
- Changes or tightens archwires
- Replaces elastic ligatures or clips
- Checks tooth movement and bite alignment
- Provides additional instructions for care and comfort
Consistent attendance is crucial to maintain treatment efficiency and achieve the desired results in the planned timeframe.
FAQs: Braces Fitting and First Days
Can I eat normally after getting braces?
Soft foods are recommended for the first 24–48 hours. Avoid hard, sticky, or chewy foods.
Will braces hurt when they are put on?
Placement is generally painless, though mild pressure may be felt. Soreness can occur in the following 1–2 days.
Are ceramic braces harder to put on than metal braces?
Placement is similar, though ceramic brackets require careful handling due to fragility.
Can adults get braces as easily as braces for teens?
Yes. Adults may have additional planning requirements due to restorations or gum health, but braces are highly effective at any age.
Do I need retainers after braces?
Yes, retainers help maintain teeth alignment once active orthodontic treatment is complete.
Final Verdict
The process of putting braces on involves careful planning, precise bracket and archwire placement, and patient-specific adjustments. While the appointment usually lasts 1–2 hours, proper preparation and following post-procedure care ensure comfort and success. Patients in Parramatta can trust Parramatta Green Dental for professional orthodontic treatment, from consultation and fitting to follow-up adjustments and aftercare guidance. With regular visits, proper oral hygiene, and adherence to advice on soft foods and bracket care, achieving a healthy, aligned, and confident smile is safe and effective.
If you’re considering braces treatment in Parramatta, book a consultation with Parramatta Green Dental today. Our experienced orthodontic team provides metal, ceramic, lingual braces, and clear aligners, ensuring a comfortable, professional, and tailored experience.